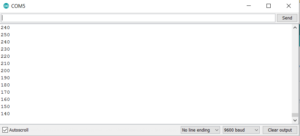
This circuit blinks a red LED at different brightness values for different amounts of times and then fades a blue LED for an indefinite amount of time. The red LED blinks has a set blinking pattern and then turns off – this is because the code is written in the setup() section, which means once Arduino executes the code once, it stops. The blue LED, however, is controlled by the loop() section, meaning the code will keep running over and over again once it reaches the end. The Serial.printIn() is included in the loop, which allows the serial monitor to print out the brightness values of the fading blue LED every time the fade amount increment changes.
Schematic:

Code:
// Blink red LED then loop fade blue LED
const int redPin = 11; // assign red LED to pin 13
int bluePin = 9; // assign blue LED to pin 9
int brightness = 0;
int fadeAmount = 10; // fade the blue LED by 10 points
int fadeSpeed = 100; // the speed at which the fadeAmount changes incremmnts
void setup() {
pinMode(redPin, OUTPUT); // assign outputs
pinMode(bluePin, OUTPUT);
Serial.begin(9600);
analogWrite(redPin, 0); // set the red LED to varying brightnesses for varying amounts of time
delay(200); // this will run only one time
analogWrite(redPin, 100);
delay(1000);
analogWrite(redPin, 255);
delay(1500);
analogWrite(redPin, 50);
delay(900);
analogWrite(redPin,95);
delay(500);
analogWrite(redPin, 0);
delay(100);
}
void loop() {
analogWrite(bluePin, brightness); // set initial brightness of blue LED
brightness = brightness + fadeAmount; // change brightness value to the brightness after runnig through the loop
if (brightness <= 0 || brightness >= 245) { // fade out after reaching maximum brightness
fadeAmount = – fadeAmount; //changing fade amount to negative to reduce brightness
}
delay(fadeSpeed);
Serial.println(brightness); // print brightness values
delay (1);
}
Screenshot of serial monitor for fading blue LED brightness: